Unlock the full potential of your boards with Monday's Developer Center and custom applications
Schedule
Free consultation >
Do you want to do more with your data on Monday.com than seems to be available? Maybe you have a new visualization feature in mind, a cool way to aggregate your data, or an existing app that you’d like to link with your boards. It may not be completely obvious, but you’re in luck! Creating custom apps and hosting them using Monday code is more accessible than ever before. A useful tutorial, created by the Monday app developers, demonstrates a React demo using Monday code. The process and information gathered from it will be the basis for this article. Let’s dive in and discover what it truly takes!
What is Monday code?
The concept of ‘monday code’ is a newly launched platform by Monday that simplifies app development for the Monday Work OS. It’s responsible for managing and hosting code on Monday servers; making the development process more efficient and ensuring high-level security. You can check out Monday’s developer documentation articles for detailed explanations of all that Monday code entails. At the time of writing, posting your app using Monday code is free of charge, which is excellent news! However, there is a possibility that fees may be introduced in the future, so it is recommended to start utilizing it as soon as possible.
Users with verified email addresses, previous experience with Monday code, developer accounts, or paid monday.com plans have access to Monday code. Each account can link up to 2 apps. It is important to mention that Monday code is most compatible with NodeJS since the Monday SDK is specifically designed for Node. Nonetheless, if you prefer working with languages like Java, Python, or PHP, Monday provides quickstart projects in various languages. Although, the processes may vary from what’s outlined in this article.
Okay, we’re ready to do something!
Setup for Working with Monday Code
Before we get to coding, it’s essential to configure your local machine and set up your Monday developer account to be prepared to work with the Monday code infrastructure.
The Monday command line interface (CLI) is installed with this command:
npm i -g @mondaycom/apps-cli
The Monday apps software development kit (SDK) is installed with this command:
npm i -g @mondaycom/apps-sdk
The last two packages will allow you to squeeze out all of the juicy functionality you need from Monday code. This is what lets you push your local files to be deployed and hosted by Monday code; it’s also what will allow you to access the Monday storage solution and many other built-in tools if desired.
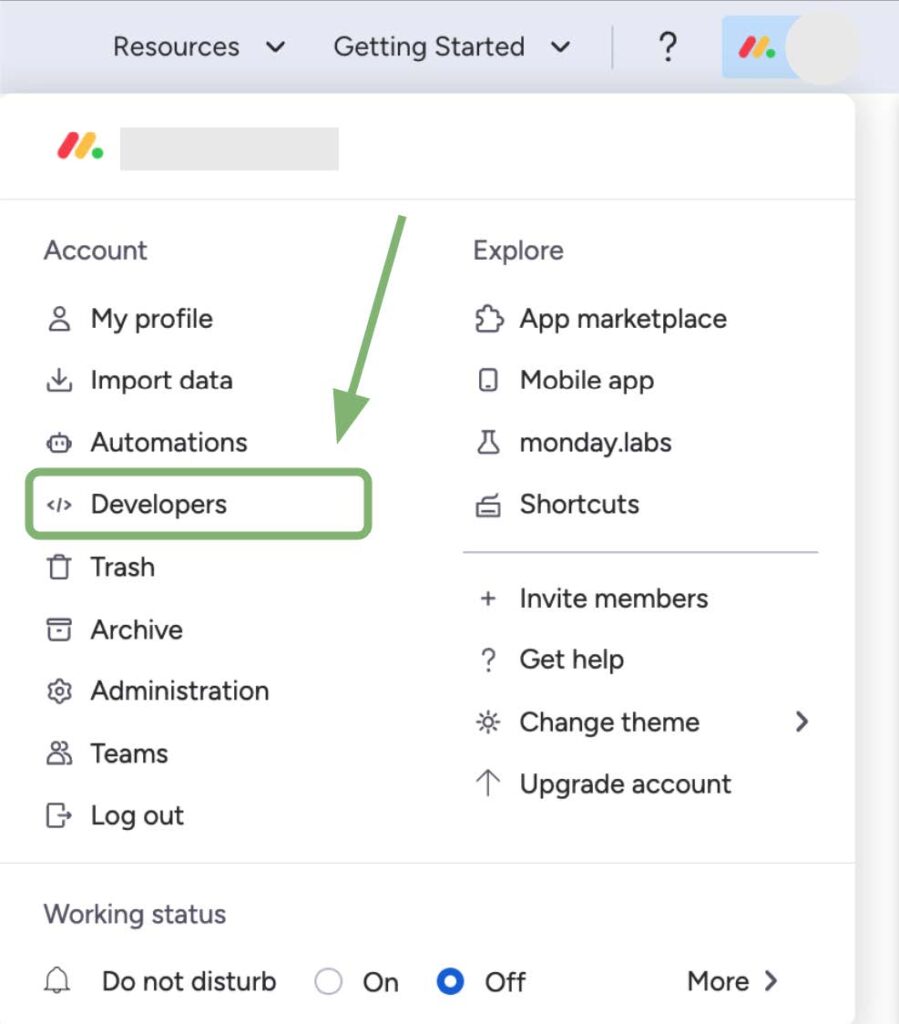
Next, you’ll need to complete the online developer account setup. Head to the ‘Developer Center’ by clicking on your profile icon in the top right corner and selecting ‘Developers’:
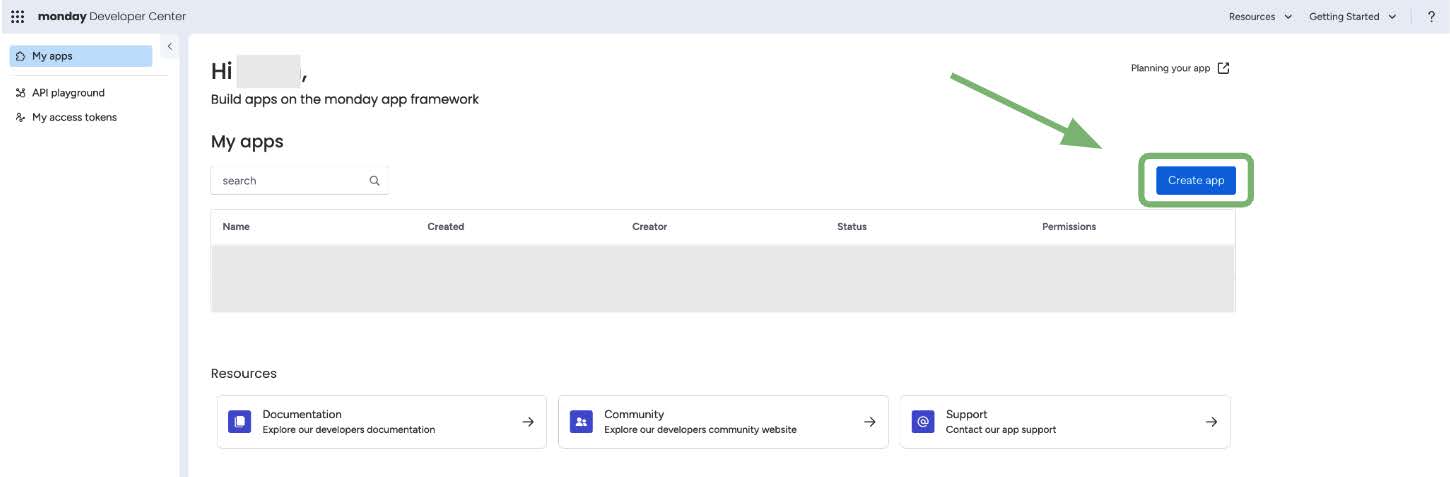
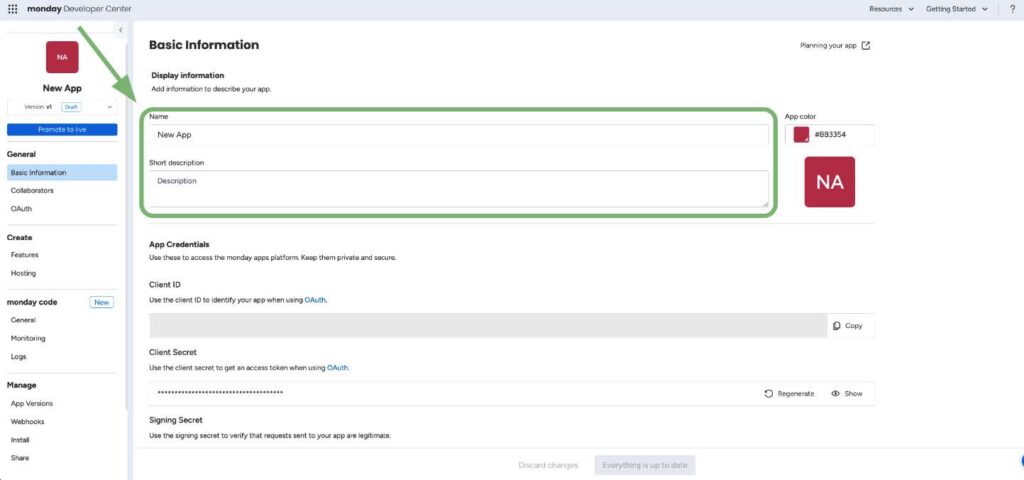
The app will need to be created in Monday code before you can push any local code to it. You can do this by clicking the blue ‘Create app’ button on the right of the screen:
From there, you can name your app (remember the name for later!) and give it a description.
Now we’re done with the boilerplate items and can finally get to our app!
How to Make a Custom Monday.com App
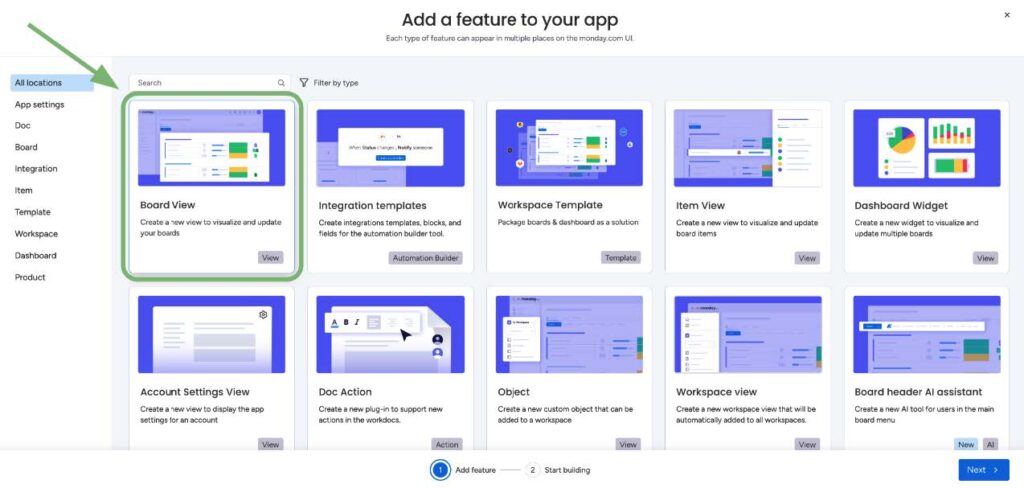
Navigate to the section labeled ‘Create’ in the menu on the left-hand side, and then choose ‘Features’. Then, proceed to select ‘Create Feature’. A variety of options for features, such as board views, item views, dashboard widgets, custom objects, “AI assistant” tools, and integrations, will be available for use within monday.com. To choose the one that’s right for you, take a look at this monday developer doc that explains the different features in detail.
In this tutorial, we’ll work with a board view. Select the ‘Board View’ option from the list of features.
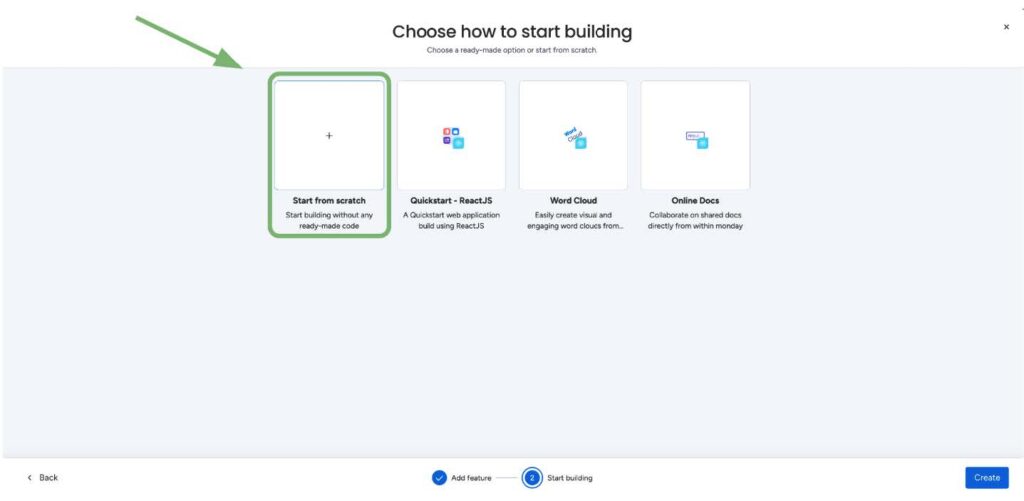
As you progress, you will need to utilize your own React code (if you have an existing project you want to integrate with monday.com) or start a new React project. It is recommended to avoid using the provided starter code as it may have issues when working with the new Monday code platform. While there are several quickstart projects on GitHub, only those tagged as “monday-code” are currently compatible with monday code, and they may not always be available. The best approach is to choose the “Start from scratch” option.
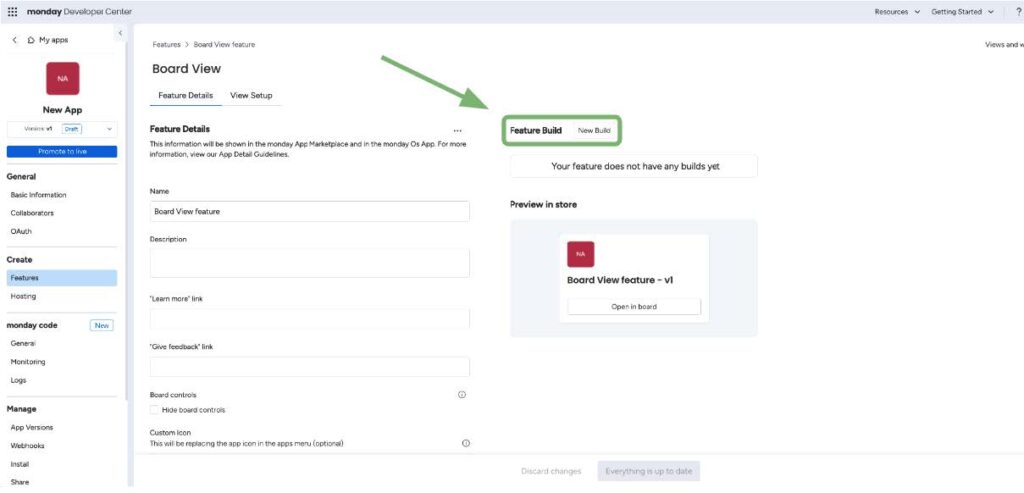
Click ‘Create’ in the bottom right corner and you’ve just made your first feature! You can customize the name and description as we did for the entire app earlier. However, you might notice that it says, “Your feature does not have any builds yet.” In other words, we’ve established the framework, but we need to connect the code.
You now have the choice to go back to your personal computer, open a terminal window, and navigate to the desired directory. Here you reach a fork in the road where you need to decide: either you have a React project ready to be uploaded to Monday, or if you are beginning a new project – both are valid! If you already have a React to implement, you can skip the next step. The upcoming instructions will concentrate on setting up a React project from scratch.
Create React App for Monday.com
In the directory you’re in, simply run the command:
npx create-react-app <YOUR_APP_NAME>
This will create and populate the subdirectory <YOUR_APP_NAME> with a template React app that you can edit and add to later on.
Now that we have the Monday code app framework set up online and some code to work with, we’re almost ready for deployment.
Publishing Your Monday.com App
Go back to the terminal. You first need to connect the CLI to your Monday account, which you can do with the following command:
mapps init -l -t <ACCESS_TOKEN>
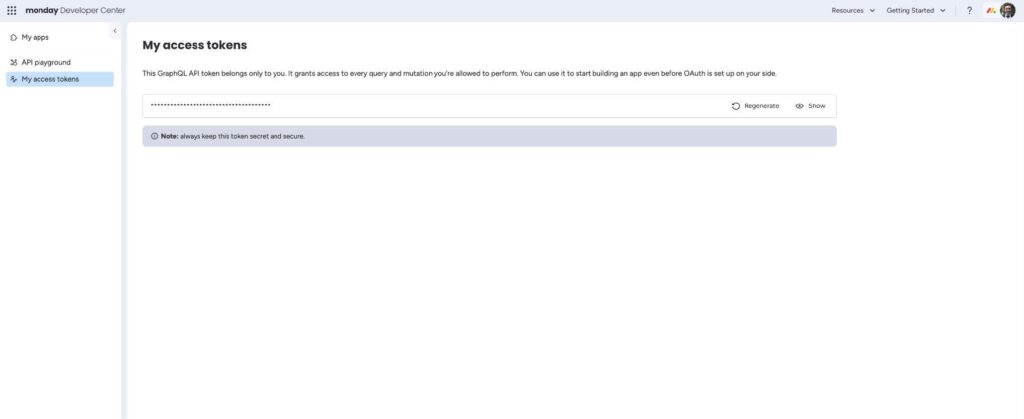
You can find your ACCESS_TOKEN in the Developer Center by selecting ‘My access tokens’ from the menu on the left. You should see this screen:
Click ‘Show’ and then ‘Copy’ to copy the token. Paste it into the command above in place of <ACCESS_TOKEN>.
Now we are ready to deploy our app to Monday code. We can do that by running this (very important) command:
mapps code:push
You’ll be prompted with a set of apps available for you to push to (if this is your first app, you’ll only see one). Choose the one you just created. Remember the name of your app for this step. Once you’ve selected the app, choose the version and proceed with the deployment process. It might take approximately 8-15 minutes to deploy the first time, so patience is key. Subsequent deployments for future updates will be quicker.
When the app is done building and deploying, a URL will appear in the terminal that ends with something like “.us.monday.app” – this is the consistent Monday-hosted link to your app. If you navigate back to your app in the Developer Center of monday.com and click on ‘General’ under the Monday code heading in the left-hand menu, you should now see the same URL!
Loading Your App into a Custom Monday.com View
Finally, to set up our feature in Monday code, we can head to the ‘Features’ tab (under the ‘Create’ heading in the left-hand menu) and select the feature we created earlier. Then click ‘New Build’.
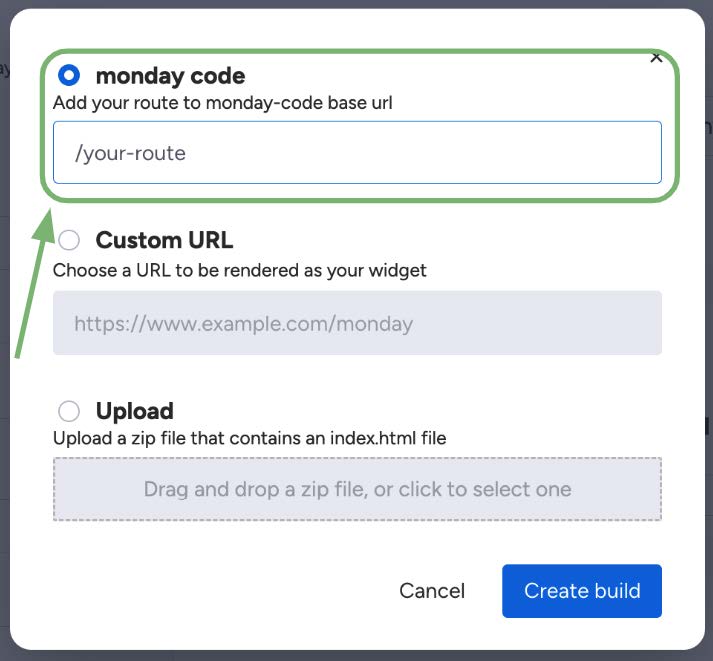
In the popup menu, choose the Monday code option. If you want this feature to be a specific route on your app, you can add that here; if not, you can just leave the field blank. Still make sure you’ve selected the ‘monday code’ option! Then click ‘Create build’ to finish.
Now comes the easy part: loading the view onto your target board. Proceed to the designated board where you want the application to display. Include your app as a view by selecting the “+” symbol, then ‘Apps’. Your app may show up in the partial list. If it doesn’t you can select ‘Explore more apps’. Your app should appear under the ‘Development Apps’ section.
Congrats! Take a moment to pat yourself on the back, show it off to your coworkers, and do a little Monday jig. The Monday.com team wants us to think this process is easy – and, with some practice, it definitely can be – but it can look complicated and long-winded at times. Stick with it, and turn to the documentation, code samples, and Monday.com developer community if you get stuck!
There’s so much more to explore with monday apps (from generating logs and managing authentication, to accessing storage and querying the GraphQL API), but we’ll end here. Keep an eye out for part 2. Thanks for reading!